PETSc: Edit and Compile Code with IDE Eclipse and CMake on Linux
(The cover image is copied from the PETSc official website)
PETSc, pronounced PET-see (the S is silent), is a suite of data structures and routines for the scalable (parallel) solution of scientific applications modeled by partial differential equations. It supports MPI, and GPUs through CUDA or OpenCL, as well as hybrid MPI-GPU parallelism. PETSc (sometimes called PETSc/Tao) also contains the Tao optimization software library. (This paragraph is directly copied from the PETSc official website.)
For my Ph.D. work I set up a developing environment for PETSc on Linux using eclipse and CMake.
PETSc installation
The version of PETSc is 3.7.4. The MPI implementation of the local system if OpenMPI 2.2.1. The OpenMPI is compiled locally from the source codes, in case the system MPI implementation is not compatible with PETSc. The switch of --with-mpi-dir= must be properly set when running the configure application of PETSc source code.
After the successful compilation of PETSc, some environment variables should be defined to facilitate later configuration of Eclipse and CMake.
Adding the following lines into your .bashrc file.
1
2
3
4
5
export PETSC_DIR=/PETsc/compilation/directory
export PETSC_ARCH=arch-linux2-c-debug
export LD_LIBRARY_PATH=${PETSC_DIR}/lib:${PETSC_DIR}/${PETSC_ARCH}/lib:${LD_LIBRARY_PATH}
export MPI_DIR=/OpenMPI/installation/directory
export MPI_NAME="mgmt"
The environment variable MPI_NAME is used later for CMake, an arbitrary string could be chosen as long as it is meaningful to the user.
Eclipse settings
In reality, it is common that the code is developed and tested locally and is used to perform actual computation on a remote computer (e.g. a remote computer cluster). Therefore, I only use Eclipse as the editor but not as an IDE. The compilation will be facilitated by CMake. And I use GDB to debug the code.
The version of Eclipse is Neon.3 (Eclipse for Parallel Application Developers).
For Eclipse to work efficiently as an editor there are two settings that should be covered.
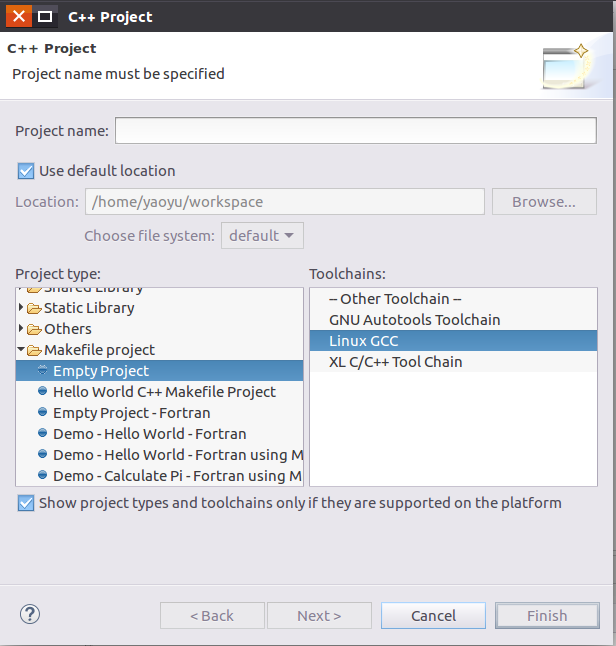
- Create or Import a C++ project as the Makefile project
In order to work with CMake, the “Makefile project” should be selected when create a new C++ project or import a source code as C++ project.
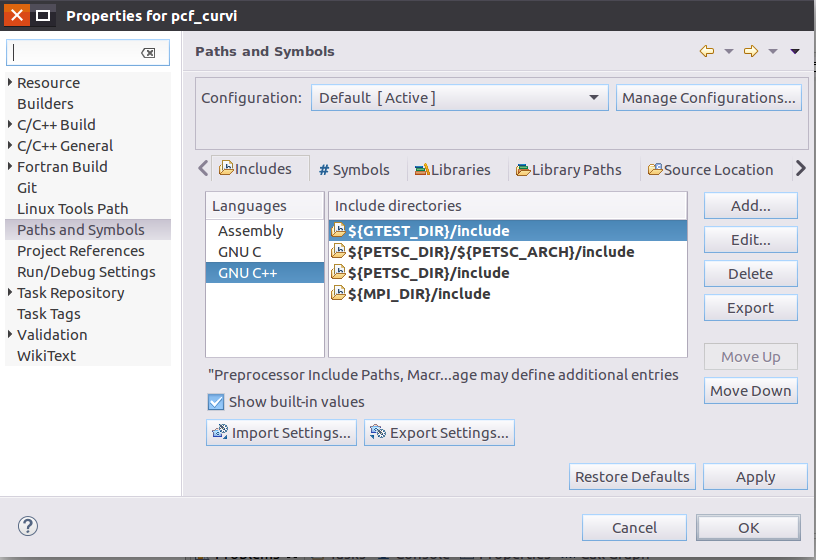
- Set up include paths
Eclipse is shipped with a code parser, the C/C++ Indexer. We have to set up proper include paths to let the C/C++ Indexer work, enabling the fancy functionalities such as cross referencing and code navigations. The following figure is an example. In this figure “pcf_curvi” is the name of the project that I am working on. This figure is the “Properties” window of this project.
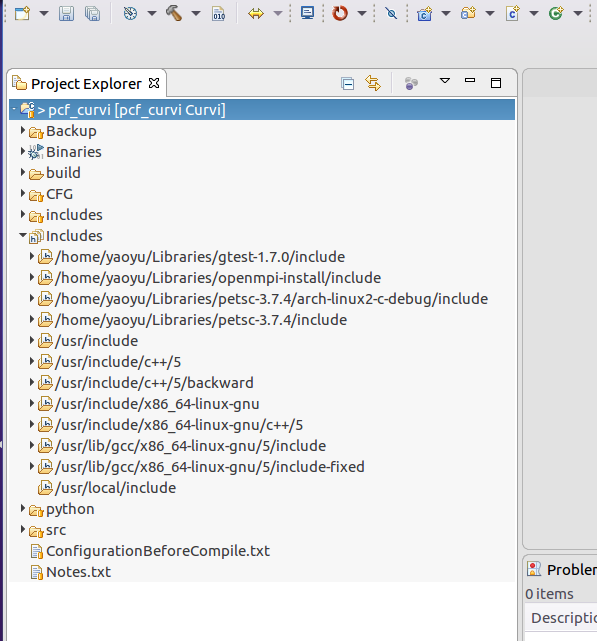
Make sure the “Includes” branch of the file tree on the penal of Eclipse window looks like the following figure, including the system default includes.
CMake
The version of CMake is 3.5.1.
Since the project I am currently working on is relatively simple, I just use CMake in a straight forward way.
First Create a file called “CMakeLists.txt” in the top level directory of the source code. Then set up CMake in CMakeLists.txt to instruct CMake to find all the source files in the source directory. Since I use C++, then the search pattern is *.cpp.
The next step is setting up include and linking paths. This is accomplished by the help of the environment variables defined previously.
Then the linking flags are set according to the implementation of MPI. Note that some linking flags may vary across different Linux distributions, and those flags are also described here, with respect to each possible distribution.
A sample CMakeLists.txt file is here.
Because I would like to build a test version of my project to perform unit tests, the CMakeLists.txt I provided above contains the descriptions that direct CMake to build two versions of executables. One to perform computation and the other one serves as the unit test. As can be seen, I use googletest to do my unit test.